Zine imposition maker for foldable and saddle-stitch zines
Use PDF Press to impose pages for printable zines — fold an 8-page mini-zine from a single sheet or build saddle-stitch zine spreads with the correct page order, margins, and fold or crop marks. It is built for zine makers, artists, illustrators, DIY and self-publishers, riso printers, and small presses, with local browser processing and a live preview before export.
Direct answer
What is zine imposition?
Zine Imposition in PDF Press helps you impose pages for printable zines — fold an 8-page mini-zine from a single sheet or build saddle-stitch zine spreads with the correct page order, margins, and fold or crop marks.
How to use Zine Imposition
Upload files
Start with your source PDF or image files. Processing happens locally in the browser.
Add Zine Imposition
Configure Paper Size, Scale, Printer's Marks and any production settings that match the job.
Preview the result
Check page order, marks, scaling, and output geometry before committing the export.
Download output
Export the finished PDF for proofing, press, finishing, or another PDF Press step.
Best use cases
Key settings
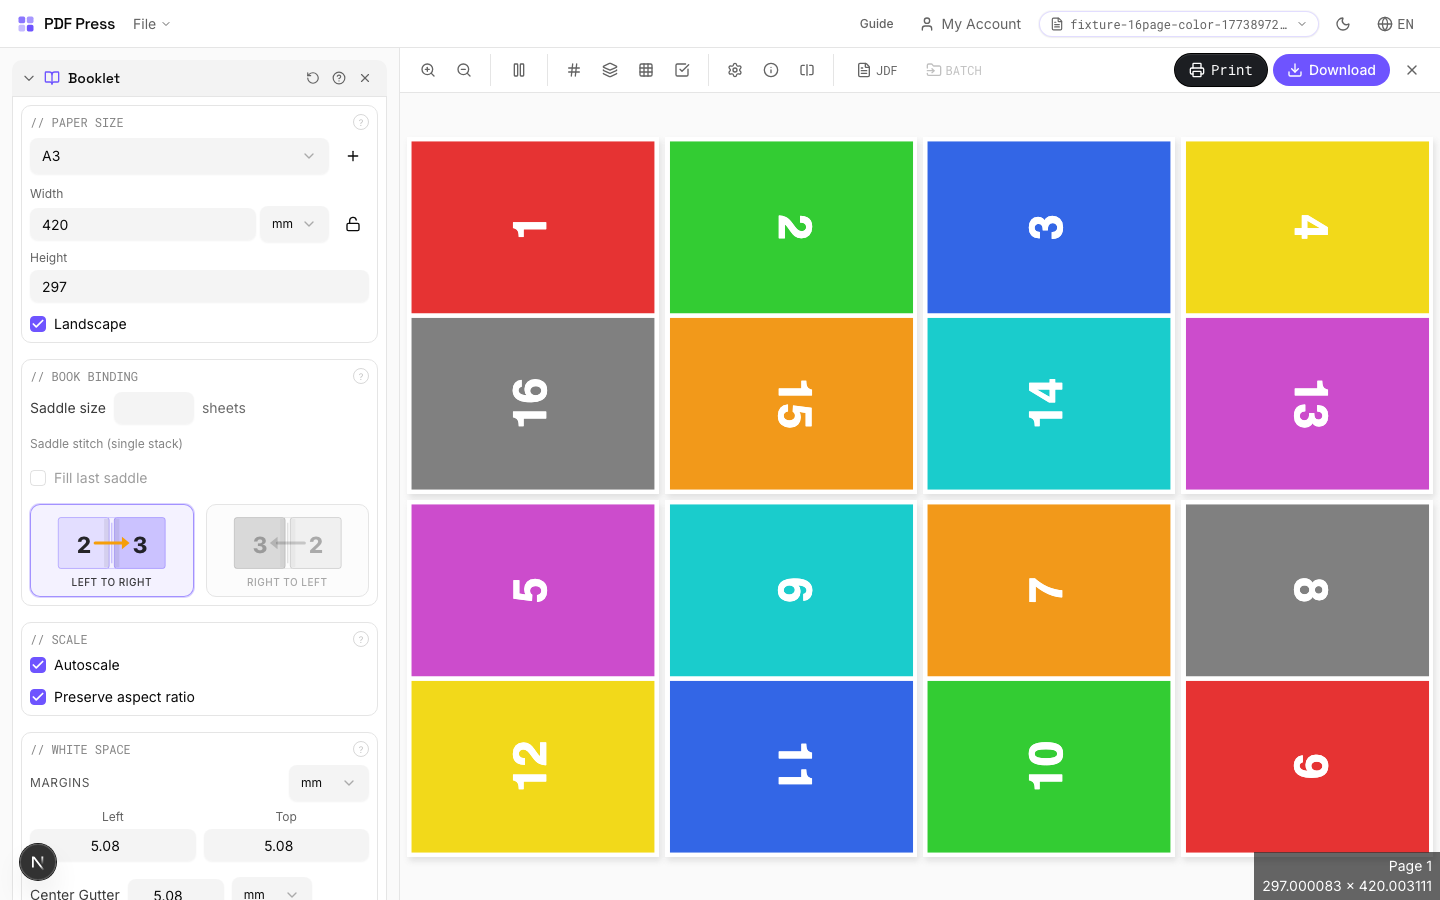
Paper Size
Sets the output sheet dimensions. This is the physical paper going through your printer or press.
Standard presets: Letter (8.5×11in), Legal (8.5×14in), Tabloid (11×17in), A4 (210×297mm), A3 (297×420mm). Landscape swaps width↔height. Lock icon links dimensions to preserve aspect ratio. Custom lets you enter any size in inches, mm, or points (1in = 72pt = 25.4mm).
Scale
Controls whether pages are resized to fit the available cell in the grid.
Autoscale ON: pages are shrunk or enlarged to fill each cell. OFF: pages are placed at their original size (may overflow or leave empty space). 'Preserve aspect ratio' prevents stretching. Pages scale uniformly and are centered, so they may not fill the cell completely in one direction.
Printer's Marks
Adds trim guides and alignment marks outside the live area for accurate cutting and registration.
Crop marks: short lines at each corner showing where to trim. Center marks: crosshairs at sheet midpoints for front/back alignment on duplex jobs. Line length (default 0.43in/31pt): how long each mark line extends. Line thickness (default 0.014in/1pt): mark stroke weight. Line distance (default 0.139in/10pt): gap between the mark and the artwork edge. Four-color black: prints marks in C+M+Y+K for visibility on color proofs. Knockout: adds a white halo around marks so they show on dark backgrounds.
Bleeds
Extends artwork beyond the trim edge to prevent white strips after cutting.
Three modes: 'No bleeds' trims exactly at the page boundary. 'Pull from document' uses bleed info already embedded in the PDF (TrimBox/BleedBox metadata). 'Fixed' lets you manually set bleed on each side, typically 3mm (0.125in / 9pt) for commercial print, 1-2mm for digital. Bleed values define how far past the trim edge the artwork extends.
Book Binding
Choose saddle-stitch (folded and stapled) or perfect binding (multiple signatures glued at spine).
Saddle-stitch: leave 'Saddle size' empty: all sheets nest inside each other and are stapled through the fold. Best for 8–64 page booklets. Perfect binding: set a number (e.g., 4 or 8) to group pages into signatures of that many sheets each. Signatures are stacked and glue-bound at the spine. 'Fill last saddle' pads the final signature with blanks if needed. Page count must be a multiple of 4 for saddle-stitch.
White Space
Margins around the sheet edge, center gutter at the fold, and page creep compensation.
Center gutter: extra space at the spine fold for binding clearance: typically 0.125–0.25in (9–18pt) depending on binding method. Page creep: compensates for paper thickness pushing inner pages outward in thick booklets. The engine auto-calculates creep per sheet based on the number of nested sheets. Inward creep shifts content toward the spine; outward shifts it away.
Output
Controls the final page orientation and rotation.
Rotate pages: produces portrait-orientation output sheets, useful for office printers that can't handle landscape feeding. The booklet content is rotated 90° so you can print on standard portrait paper and fold.
Expert tip
Page count must be a multiple of 4 for saddle-stitch. Anything over 48 pages should go to perfect binding; creep becomes unmanageable beyond that thickness.
On stock heavier than 120 gsm, turn on creep compensation or the outer margins on inner sheets will get progressively wider after trimming.
Production recipes using Zine Imposition
Saddle-Stitch Booklet
Standard saddle-stitched booklet. The most common short-run binding method.
Saddle-Stitch with Bleeds
Saddle-stitch booklet with synthetic bleed generation for artwork delivered without bleeds.
A5 Saddle-Stitch 2-Up on SRA3
Commercial A5 booklet workflow: impose on SRA4 flats, then repeat two copies on SRA3.
Zine / Mini Booklet
Small-format DIY zine from a single sheet of paper (8-page or 16-page fold).
Frequently asked questions
What is Zine Imposition used for?
Arranges pages into printer spreads so they read correctly after folding and binding.
Who should use zine imposition?
It is built for zine makers, artists, illustrators, DIY and self-publishers, riso printers, and small presses. Common use cases include Magazines, Zines, Brochures, Programs, Manuals.
Do my PDF files upload to a server?
No. PDF Press runs the PDF processing workflow in your browser, so your files stay on your device.
Can I use Zine Imposition with other PDF Press tools?
Yes. You can combine it with other PDF Press tools in a multi-step workflow, then preview and export the final PDF.
How do I impose an 8-page mini-zine from a single sheet?
An 8-page mini-zine folds from one sheet printed on one side. The trick is page order: the eight panels are not in reading order on the sheet, because folding and cutting rearranges them. Add your 8 pages, choose a single-signature booklet/fold layout, and PDF Press places each page in the correct panel and orientation so that after you fold and make the single cut, the pages read 1–8 in order.
What is the difference between a folded zine and a saddle-stitch zine?
A folded (mini) zine is one sheet folded into 8 small panels with a single cut and no staples — fast and free to make at home. A saddle-stitch zine prints multiple sheets as nested spreads that are folded together and stapled on the spine, which scales to 8, 12, 16, 24+ pages. PDF Press handles both: pick the single-sheet fold layout for a mini-zine, or the saddle-stitch booklet layout for a stapled zine.
What page count and paper size should a zine use?
Zine page counts are multiples of 4 for saddle-stitch (8, 12, 16, 20, 24…) so spreads nest cleanly, while a classic single-sheet mini-zine is exactly 8 pages. Common sizes are quarter-letter (4.25 by 5.5 in) and half-letter (5.5 by 8.5 in) folded from Letter or A4 stock. PDF Press lets you set Letter, A4, A3, Tabloid, or a custom size, and previews the folded result before you export.
Can I add fold marks, bleed, and crop marks to my zine?
Yes. You can add fold marks to show where to crease the sheet, crop marks for trimming, and a bleed (3 mm or 0.125 in is standard) so artwork runs to the edge after cutting. These help both home printing and sending the zine to a copy shop, riso studio, or commercial printer.